
Edge banding is an essential part of many woodworking projects, providing a clean, professional finish to raw edges of plywood, MDF, or particleboard. However, if you’ve ever experienced issues with edge banding not sticking, it can be frustrating and costly. In this article, we’ll explore the common reasons why your edge banding may not be adhering properly and how you can fix it.
1. Incorrect Adhesive or Low-Quality Glue
One of the most common reasons edge banding fails to stick is the adhesive used. The type of glue matters significantly, as the wrong kind can fail to create a strong bond. For example, PVA (polyvinyl acetate) glue is ideal for most wood-to-wood bonding, but it may not work well for certain synthetic or laminate edge bands. On the other hand, hot-melt adhesives, which are often used in edge banding, may lose their bonding strength under high temperatures or humidity.
Solution:
- Use the correct adhesive recommended for the type of edge banding you’re using.
- Ensure you are using high-quality, professional-grade glue specifically formulated for edge banding.

2. Improper Surface Preparation
For the adhesive to properly bond, the surface must be clean, dry, and free from any contaminants such as dust, oils, or wax. If the edge of the substrate (like MDF or plywood) is not smooth, rough, or has a build-up of dust, the bond will not be as strong.
Solution:
- Sand the edge of your material to ensure a smooth, clean surface.
- Wipe down the surface with a tack cloth or clean, lint-free cloth to remove any dust or debris before applying the adhesive.
3. Incorrect Temperature or Humidity Conditions
Edge banding, especially with hot-melt adhesives, can be highly sensitive to temperature and humidity. If the room is too cold, the adhesive may not melt or flow properly. Likewise, high humidity can interfere with the bonding process, especially with certain types of glue or edge materials.
Solution:
- Always work in a controlled environment with a temperature range between 65°F (18°C) and 75°F (24°C).
- Avoid applying edge banding in high-humidity environments or during rainy seasons.
4. Inadequate Pressure During Application
Pressure plays a crucial role in the bonding process. If you don’t apply sufficient pressure when applying the edge banding, the adhesive won’t create a proper bond. A roller is typically used to apply even pressure across the edge banding, but if you are using manual methods, it might not be enough.
Solution:
- Use a pressure roller or an edge banding machine with adjustable pressure settings to ensure a firm, even bond.
- If applying manually, make sure to press the edge banding firmly and evenly along the entire length.
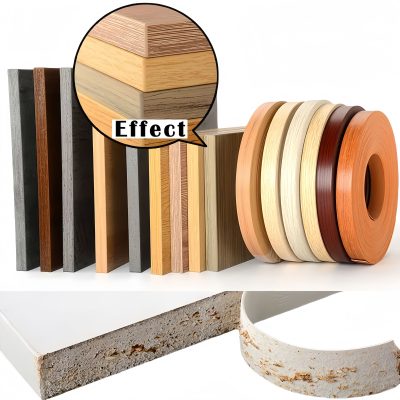
5. Edge Banding Material Issues
Not all edge banding materials are created equal. Low-quality or damaged edge banding, or even incompatible materials, may not adhere well to the substrate. Some edge bands are pre-finished with coatings or lacquer that can prevent adhesives from sticking properly.
Solution:
- Ensure you are using high-quality edge banding that matches your substrate material.
- Check the edge banding for any damage (e.g., cracks or curling) before application, as damaged material can cause bonding issues.
6. Overheating the Edge Banding
If you are using a hot-melt adhesive and overheat the edge banding, the glue can become too thin and lose its adhesive properties. Applying too much heat or keeping it on the heating element for too long can cause the adhesive to become too liquid, resulting in poor adhesion once it cools down.
Solution:
- Follow the manufacturer’s instructions regarding the recommended temperature for applying the edge banding.
- Avoid overheating the adhesive; it should be warm enough to bond effectively but not too hot to become overly runny.
7. Inconsistent Application of Adhesive
If the adhesive is applied unevenly across the surface, the edge banding may not stick in certain spots, leading to a weakened bond. Uneven glue lines or areas with excess or insufficient adhesive can create problems with adhesion.
Solution:
- Apply an even layer of adhesive across the edge, making sure it covers the entire surface.
- Use a glue spreader or a nozzle that provides a uniform distribution of adhesive.
8. Edge Banding Not Held in Place Long Enough
Sometimes, the edge banding needs to be held in place for a specific amount of time to ensure proper bonding. If you remove the pressure too quickly or the banding shifts during curing, it may not adhere properly.
Solution:
- Allow adequate time for the adhesive to cure according to the product instructions.
- Use clamps or edge banding machines to hold the edge banding in place for the recommended duration.
Conclusion: Ensuring Strong and Long-Lasting Edge Banding Adhesion
If you’re dealing with edge banding that won’t stick, it’s important to diagnose the root cause of the problem. Whether it’s choosing the wrong adhesive, failing to prep the surface, or not applying enough pressure, addressing these factors will go a long way in ensuring your edge banding stays secure and provides a professional finish.
In my opinion, attention to detail is key. By carefully selecting quality materials and adhering to the best practices for edge banding, you can avoid these common mistakes and significantly improve the outcome of your projects. Always perform a small test area before committing to large-scale applications, and don’t be afraid to ask for advice from edge banding professionals if you’re in doubt!