
Gluing edge banding is a critical step in the process of finishing the edges of furniture or other surfaces. The goal is to create a strong and durable bond that enhances the appearance and longevity of the piece. Here’s a step-by-step guide on the best way to glue edge banding:
Materials and Tools Needed:
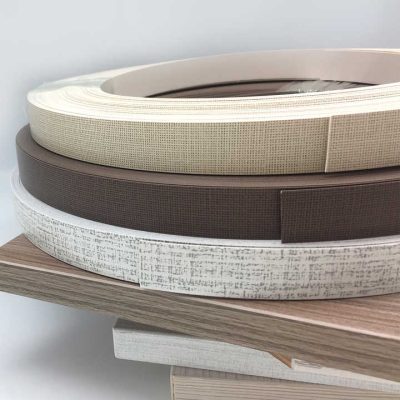
- Edge Banding Material: PVC, melamine, wood veneer, or other edge banding material.
- Glue: High-quality adhesive suitable for the specific type of edge banding material. Common choices include hot melt glue, contact cement, or specialized edge banding glue.
- Applicator or Roller: A roller helps apply even pressure for better adhesion.
- Trimmer or Utility Knife: For trimming excess edge banding.
Steps:
1. Prepare the Substrate:
- Ensure that the substrate’s edge is clean, smooth, and free from dust or debris. If needed, sand the edge to create a smooth surface.
2. Cut the Edge Banding:
- Cut the edge banding slightly longer than the substrate’s edge. A little overhang on each end helps ensure complete coverage.
3. Apply Glue to the Edge Banding:
- Apply the adhesive to the back of the edge banding. The specific application method depends on the type of glue used. Follow the manufacturer’s instructions for the particular adhesive being used.
4. Apply Glue to the Substrate:
- If using contact cement or similar adhesives, apply a thin, even coat to the substrate’s edge. Ensure complete coverage.
5. Position the Edge Banding:
- Align the edge banding with the substrate’s edge. Carefully position it, ensuring an even overhang on both ends.
6. Apply Pressure:
- Use a roller or another suitable applicator to apply even pressure along the entire length of the edge banding. This helps to ensure proper contact between the banding and the substrate.
7. Activate Heat-Activated Adhesives:
- If using a heat-activated adhesive (such as hot melt glue), activate it by applying heat using an edge banding machine or a household iron. Follow the manufacturer’s recommendations for temperature and duration.
8. Trim Excess Edge Banding:
- Once the adhesive has set, trim the excess edge banding using a trimmer or a sharp utility knife. Trim along the edges of the substrate for a clean and flush finish.
9. Optional: Sand Edges:
- Optionally, sand the edges to ensure a smooth and seamless transition between the edge banding and the substrate.
10. Clean Up Excess Glue:
- If any adhesive has squeezed out during the application, clean it up promptly using a suitable solvent or by scraping it off carefully.
11. Allow to Cure:
- Allow the glued edge banding to cure fully according to the adhesive manufacturer’s recommendations before subjecting it to stress or use.
Tips:
- Work Efficiently:
- Adhesives like contact cement often have a limited open time. Work efficiently to align and apply the edge banding promptly after applying the glue.
- Use the Right Glue:
- Select an adhesive that is suitable for the specific type of edge banding material you are using. Different materials may require different adhesives.
- Follow Manufacturer’s Instructions:
- Always follow the manufacturer’s instructions for both the edge banding material and the adhesive to ensure the best results.
By following these steps and using the appropriate materials and tools, you can achieve a strong and professional bond when gluing edge banding.